It’s time to break out your paints and bottles of ink and get crafty. Andie Powers and Emily Grosse of Seattle’s Assemble Shop & Studio, an online source for arty inspiration, have released their first book, Print, Paint & Ink: Over 20 Modern Projects for You and Your Home. The book is filled with more than 20 stylish craft projects that embrace bold colors and take inspiration from around the globe.
The book provides detailed instruction on how to make a variety of stamps, prints and painted accessories. Parents will enjoy doing the projects with older children or carefully supervised littler kids.
Teeny-tiny eraser stamps will be a hit with the younger set and the fruit and veggie dip-dye swatches are a great way to teach preschoolers about colors and how coloring fabrics works. The subtle hues created by the tie-dye-like technique will remind one of watercolor paintings, and are a great use for all those fruit bits that are about to go bad. Color-blocked stone paperweights are a great way to reuse the rocks your toddler has been collecting for years in the back of your mini-van. Paint them with acrylic paint or paint pens in fun designs for a great upcycled project.
The mini “adventure logs” are a great way to document next summer’s vacation and trips. Kids of all ages will enjoy cutting out the pages and sewing the book binding. And the Spirographed tote is perfect for all those afterschool activities.
Class up your gift giving with a custom-made Furoshiki wrap — a Japanese cloth that is used to wrap and carry presents, groceries, etc. Or delight new parents by making them a Scandinavian mini blanket, hand-stamped with a homemade cross stamp and designed to honor the Pacific Northwest’s deep Nordic heritage.
Print, Paint & Ink is a terrific collection of some of Powers and Grosse’s best projects. The two moms have serious art bona fides: Grosse’s work history includes jobs with the Chicago Artists Coalition and the Art Institute of Chicago, and Powers has worked with corporate trend, design and craft companies locally and in Boston and Los Angeles. In 2009 the duo opened Assemble Gallery & Studio in Seattle’s Phinney Ridge area, but three years ago moved their crafting exclusively online and changed their name. Assemble also provides video tutorials and workshop kits.
Print, Paint & Ink: Over 20 Modern Projects for You and Your Home is available through the
Assemble Shop & Studio or your local bookseller for $16.95.
Make it yourself: Fall-inspired linoleum block stamps
by Emily Grosse and Andie Powers of Assemble Shop & Studio
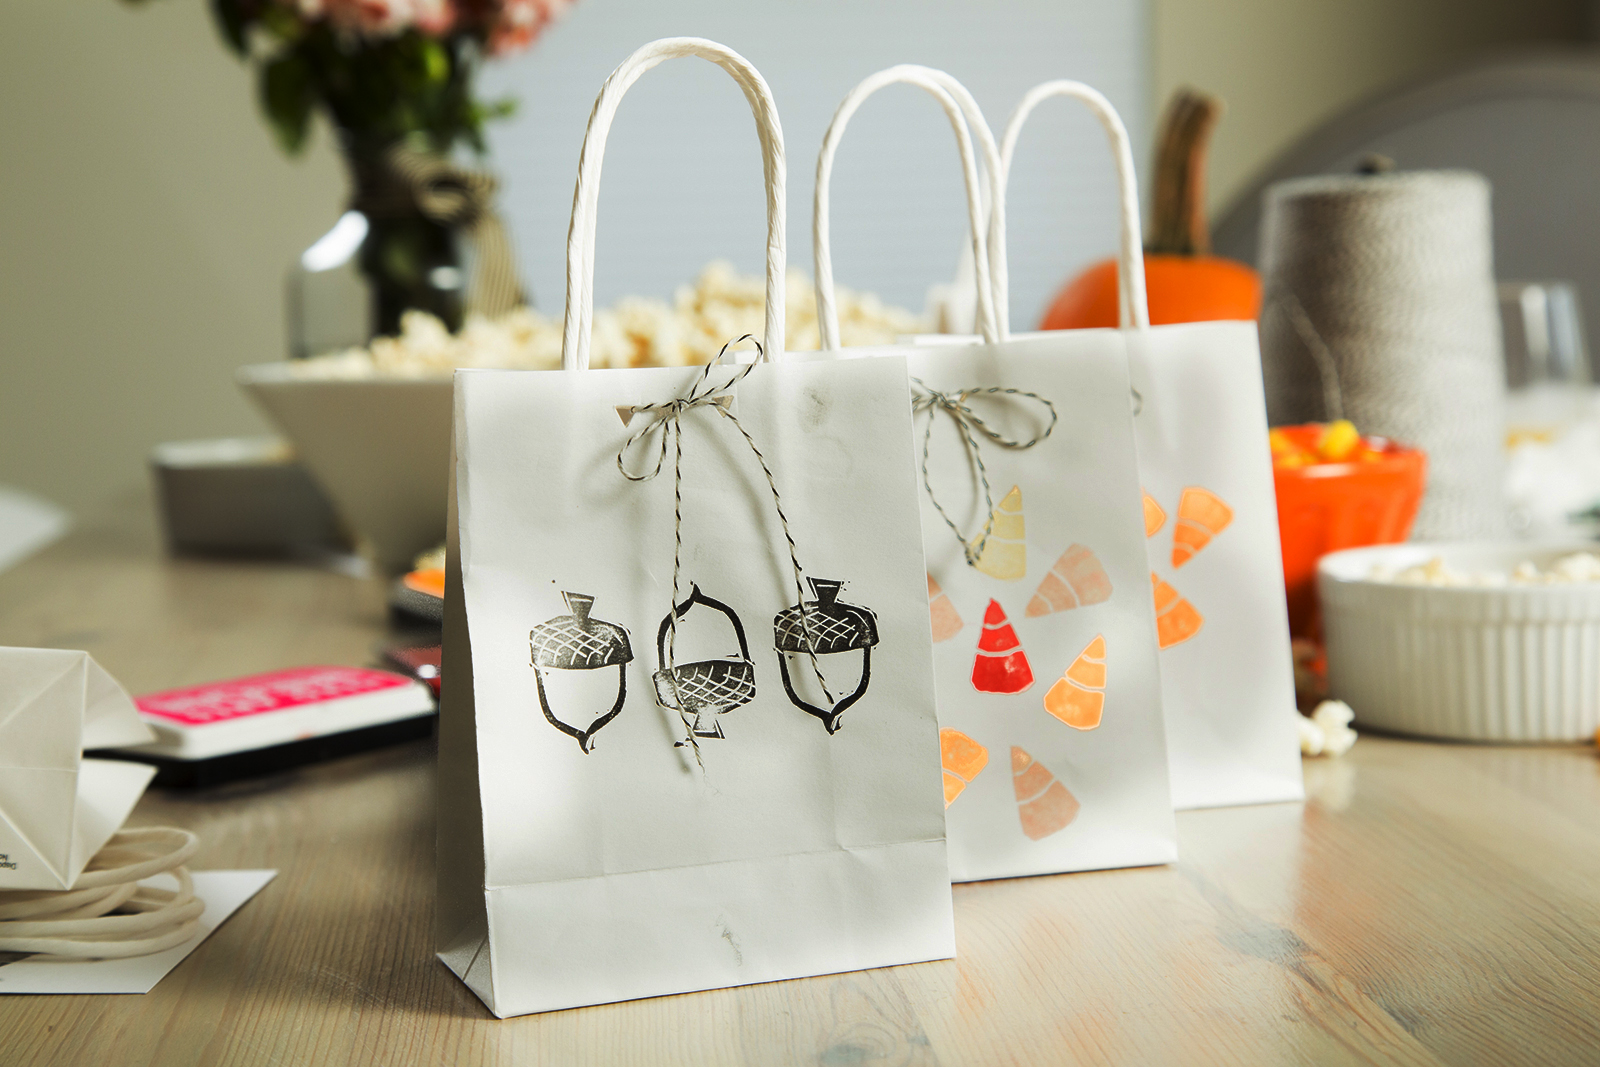
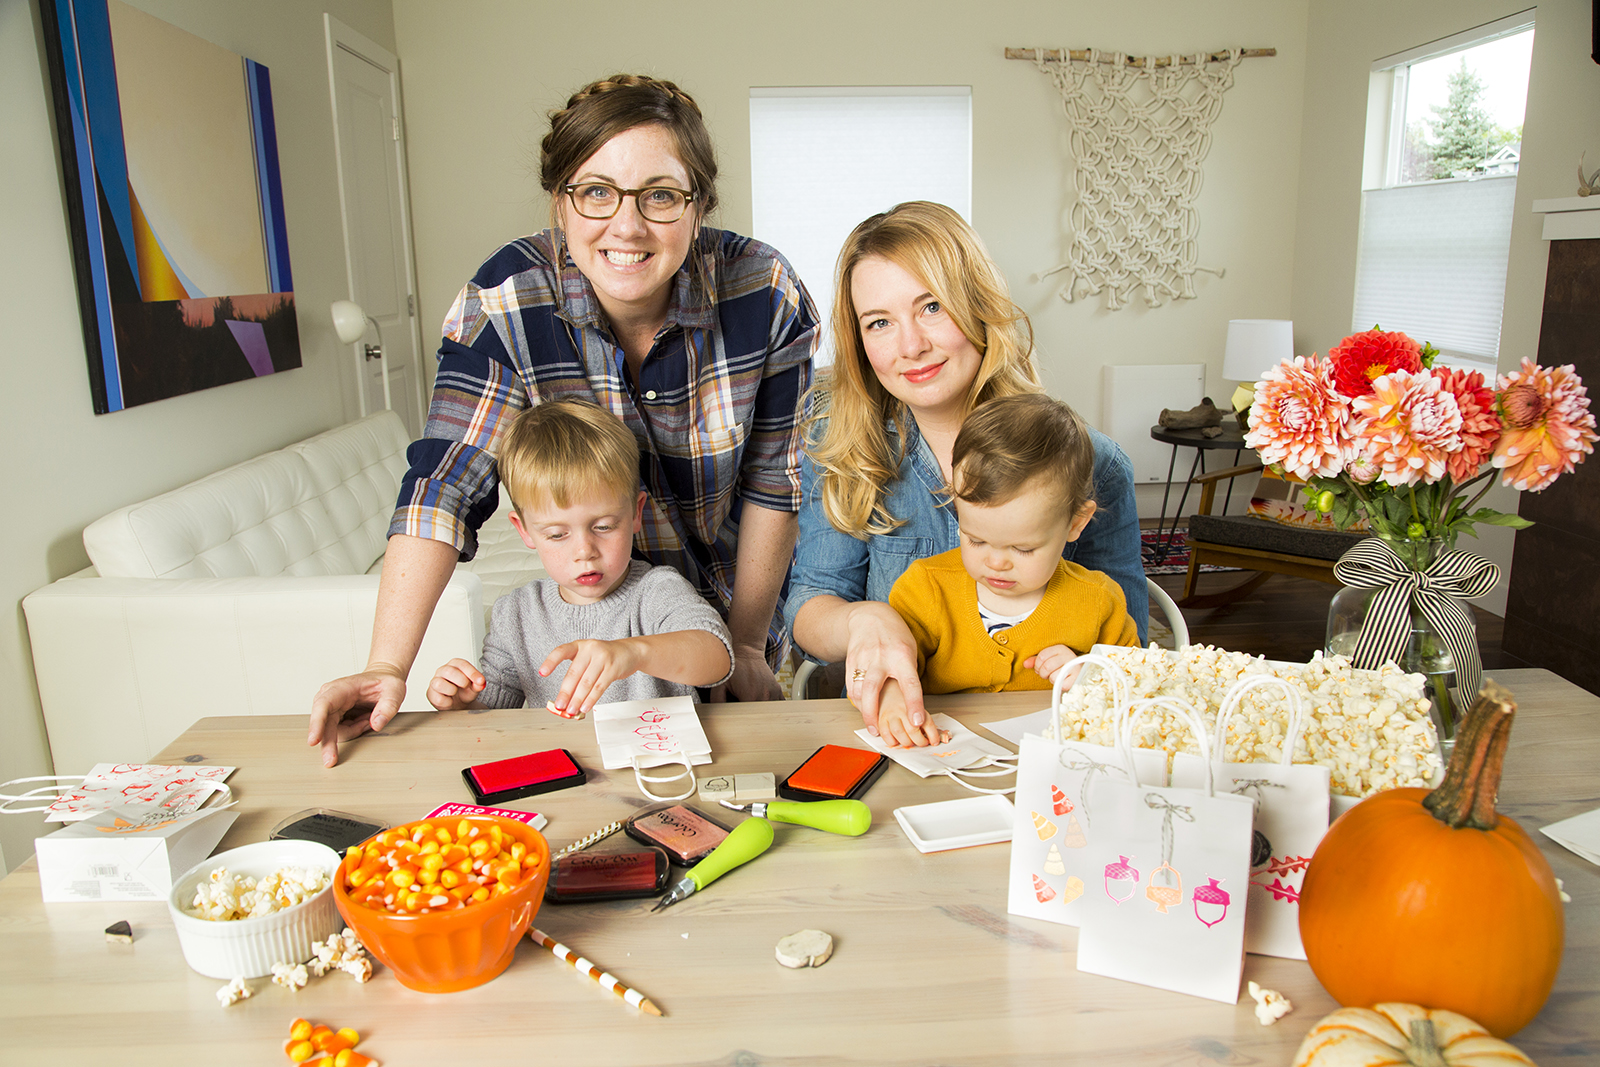
PHOTO: JOSHUA HUSTON Custom-stamped goodie bags are perfect for classroom Halloween favors and teacher thank-you gifts. |
Using linoleum to carve your own stamp is fun and easy! Kids will have a blast drawing their very own images and then stamping one-of-a-kind holiday treat bags. We recommend that an adult do the carving, but leave the fun inky part for the kiddos!
Materials
• 4 x 6-inch unmounted, soft linoleum carving block (We used a MOO Carve Printing Block. You could get a handful of small stamps out of just one block.)
• Ink pads (We recommend ColorBox washable ink.)
• Small paper gift bags
Tools
• Pencil
• Scrap paper
• Lino cutter handle with a variety of nibs (We used a Speedball cutter with no. 1, no. 2, and no. 5 knife blades.)
• Precision knife
• Paper punch
• Twine, string or ribbon
Instructions
1. Draw your image directly onto the linoleum block with a pencil. If you make a mistake, just erase or keep drawing ó nothing is permanent until you carve! Depending on the size of your images, you may fit several designs on a single block.
 |
TIP: Your stamped image will be printed in reverse, so be sure any text or directional images are drawn mirrored. Keep in mind what parts of your image will be recessed, creating negative space.
2. To begin carving, insert the thinnest blade into the lino cutter. Gently glide the cutter along the outline of the shape. Always push the cutter away from you, and be careful as you brace the block with your other hand. A very thin strip of linoleum should be removed with each cut.
 |
3. As you work around the outline, switch to a larger blade to remove more linoleum with each pass. At any point while carving, ink up the block and stamp it on scrap paper to see areas that need more work. You can completely cut off the edges of the block with a
precision knife so the entire stamp is the outlined shape.
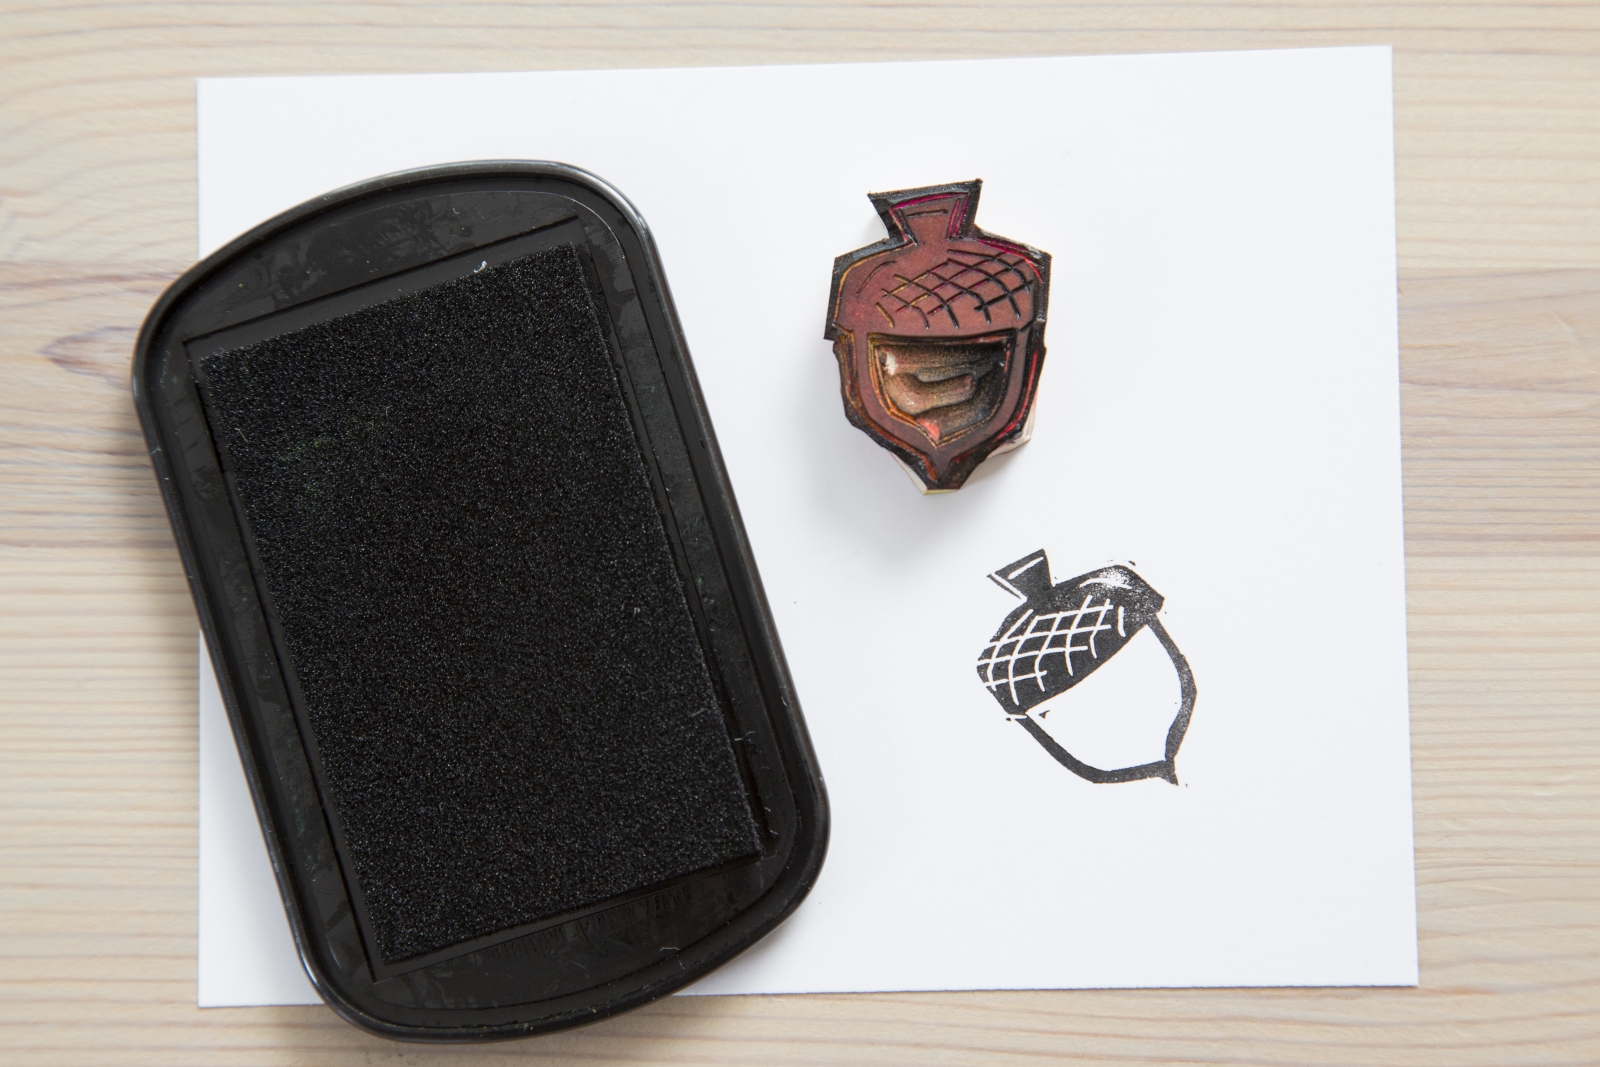 |
4. When you're happy with the finished carving, stamp away! Fill the bags with your favorite fall treats and tie with some string.