As the days get shorter and a slight chill in the air sets in, we all look for indoor activities that can keep our kids occupied. Trying a new fall art project is a fun, relaxing way to engage the whole family’s creativity.
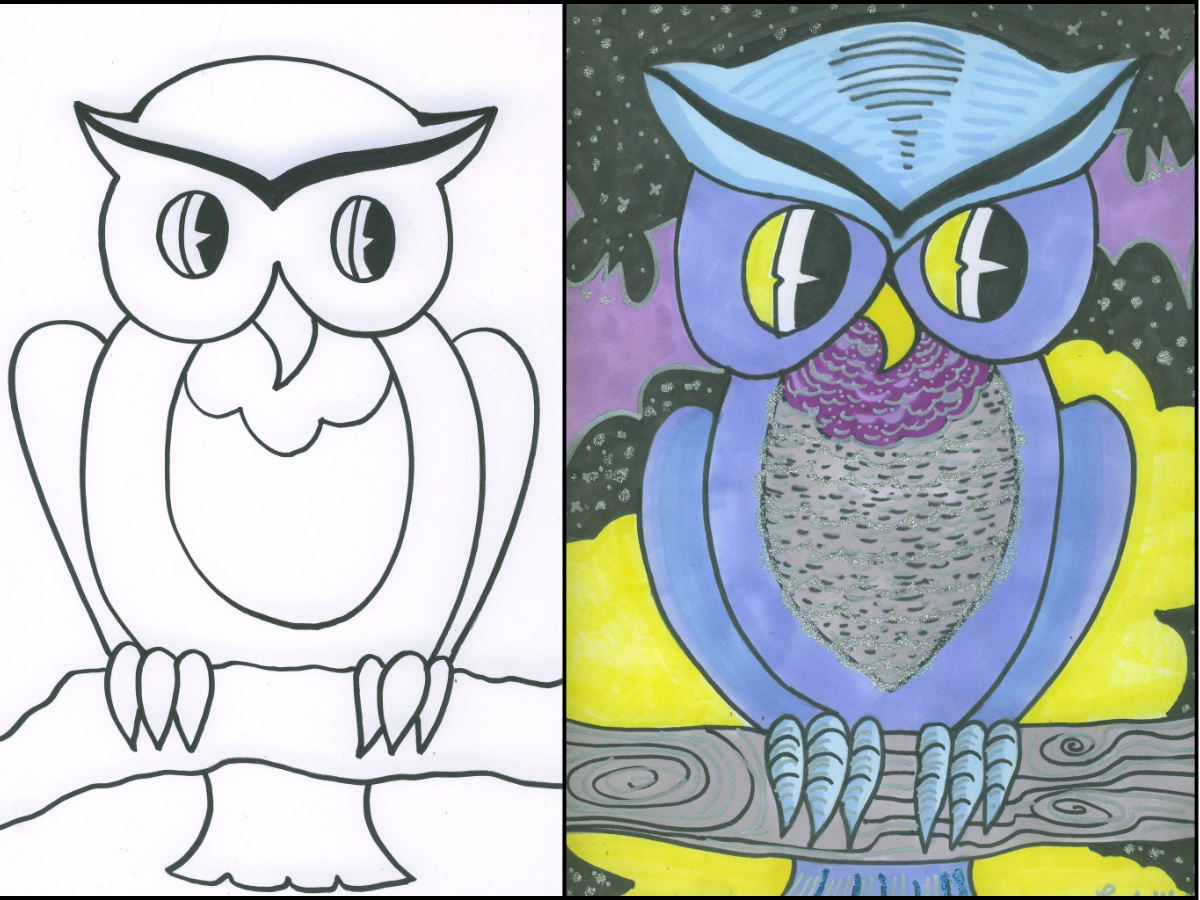
This owl drawing is great for kids and adults alike, and works with whatever art materials you’ve got at home. Owls are perfect for using lots of the fall colors your kids see in nature, but don’t feel stuck keeping things realistic! Tons of artists use owls as a creative design, adding their own imaginative patterns and playful, bright colors. Have fun with this fall art project for kids.
Supplies for this fall art project:
- sturdy, smooth paper (like white card stock)
- permanent black pen
- markers
- optional additional supplies: colored pencils, glitter glue
Note: If you prefer to use watercolors or other paints, consider using watercolor paper instead.
Directions
- This fall art project is about drawing yes, but also about learning! Talk with your kids a little bit about owls, if they’re curious. This can get them excited about what they’re doing, and help them think of ideas for how to decorate the drawing. Owls live in almost all parts of the world, and are nocturnal. Most can fly silently, and their large eyes help them see in the dark. Since they can’t move their eyes like we do, their heads turn really far – so far that they don’t even need to move their body to see behind them!
- Take a little time to warm up with some scratch paper. You can practice by trying out parts of the picture, such as the eyes or feet.
- Start by doing the curvy “V” in the owl’s head, in the top half of your paper. This will help you build the shape of the owl’s face!
- Add little points at the ends of the “V”, then connect them with a curve for the top of the head. Use two connected curves for the bottom of the face.
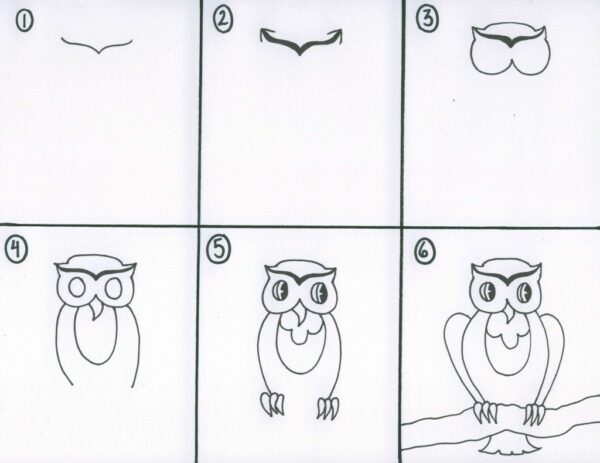
Follow the step-by-step guide to help kids draw their own owl. Each stage is easy to follow, making this fall art project fun for all ages. (Image: Theresa Harris)
- Follow the steps in the picture, adding your beak, eyes, body and feet one piece at a time. Save your wings and tail for last, after you’ve outlined a branch for your owl to sit on.
- Keep going! Consider adding some fun details to your background, if you’d like, and then fill in the colors with markers. Once you’ve filled everything in, try using colored pencils on top of the marker to add extra details, or add some sparkle with a light coat of glitter glue! Encourage older kids to add patterns and layered colors to show details like feathers and the textures of the talons, branch, etc. For younger kids, you can use a simpler version that skips the feet and focuses on more basic shapes. This fall art project is fun to adapt with patterns, glitter or bright colors.
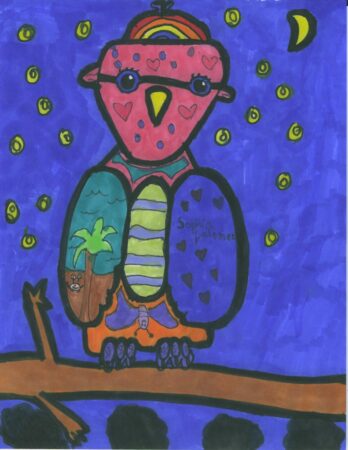
Check out how Sophia, age 8, used this lesson concept and basic shapes to make her wonderful artwork!
(Image: Theresa Harris)