Planning a trip to Mount Rainier and wondering which hikes are actually doable with kids? With so many trails across the park, it can be tough to know where to start. This guide highlights the best Mount Rainier hikes for families, including easy, kid-friendly options that deliver big views without overwhelming little legs.
No timed reservations
In 2026, the park will not require timed entry reservations. From May through September, visitors can enter the park through either the Nisqually Entrance via State Route 706 or the Stevens Canyon Entrance via State Route 123. The White River/Sunrise Entrance via State Route 410 will be open from July through September.
Entrances and hiking conditions
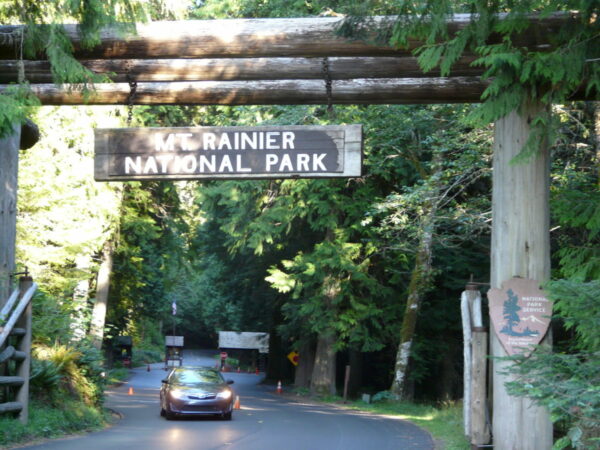
There are three primary entrances to Mt. Rainier National Park: Nisqually, White River/Sunrise, and Stevens Canyon. Each entrance is a 2-2.5- hour drive from Seattle. The Nisqually entrance is the most popular and open year-round to vehicles. Rangers encourage visitors to check the national park’s website for up-to-date information on when the entrances are open.
Before you head up to the mountain, check the trail conditions. Many trails have a percentage of snow on them in early July, and traveling with little kids may not be ideal. Also, the Grove of Patriarchs hike is closed until further notice.
Nisqually entrance at Mt. Rainier National Park. jb10okie/Flickr CC
Park passes
Purchase an America the Beautiful Pass to access entrance into Mt. Rainier National Park and more than 2,000 other federal recreation sites. At $80 for an annual pass, this is a wonderful option for families who plan to visit Mt. Rainier and other parks throughout the year.
If you’re planning to explore Mt. Rainier National Park only, purchase a single 7-day pass for one vehicle (up to 15 passengers). You can purchase this pass at the entrance to the park or online for $30. Online purchases are encouraged to reduce your wait time at the park entrance. All reservations must be made electronically and with a credit/debit card. Cash will not be accepted at park entrances.
Families with 4th graders can also sign up for the Every Kid Outdoors program. Receive a free pass that allows your child and family into federal parks, lands, and waters for one year.
Parking and when to go
Summer gets really crowded on the mountain, and wait times to get in can be long. Check out these tips from the National Park Service to lessen your wait.
Keep in mind that traveling to other entrances may take up to two hours or more, depending on which entrance you choose. The Mt. Rainier road status page and the webcam pages will help determine your next move. Check out which roads are closed or have delays. Look at the webcams when planning your trip to estimate the amount of snow on the ground. Even in warm weather, snow may be on the ground, so dress in layers and wear good hiking shoes. Be prepared to turn back on the hike in the earlier summer months due to icy conditions on the trails.
Consider a Monday-Thursday visit
The rangers I spoke with recommended an early weekday trip to avoid traffic and congestion. Families can also arrive early in the morning or later in the evening to avoid weekend crowds.
Mountain views at Sunrise. jb10okie/Flickr CC
Mount Rainier Hikes
Whether you’re looking for a short hike or planning a series of hikes around Mt. Rainier, here are some suggestions that are great for little legs and enjoyable for the whole family.
White River/Sunrise area trails | At 6,400 feet, Sunrise is the highest point on Mt. Rainier, accessible by car. Before heading out on your hike, visit the Visitor’s Center and grab a map, talk to a ranger, sign up for a guided hike, or purchase a souvenir.
Sunrise Nature Trail (Easy, 1.5 miles)
Note: The road to Sunrise is currently closed for winter. It is expected to open in July 2026.
- Distance: 1.5 miles
- Elevation: 300 feet
- Wildflowers and wildlife: Flowers begin to bloom in July and peak in August. Hikers have seen many squirrels and mountain goats.
Enjoy this trail near the upper end of the picnic area at Sunrise. The trail boasts majestic views of Mt. Rainier and the Cascades. Hikers report seeing some patches of snow, but easy to navigate with kids. Hike the loop clockwise for a smoother walk along the path.
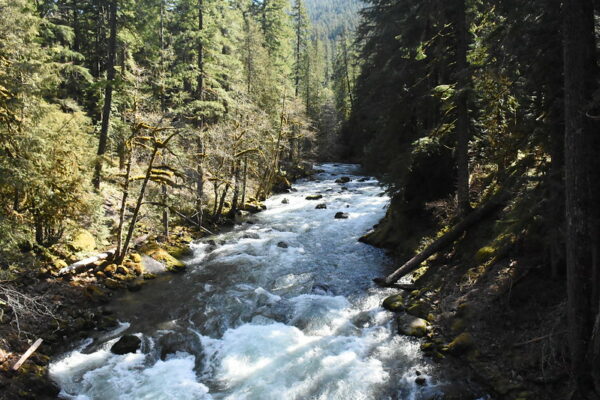
Ohanapecosh River (Image: Mt. Rainier National Park)
Ohanapecosh Area Trails
Hot Springs Nature Trail (Easy, 0.4 miles)
Note: SR 123 (Cayuse Pass) is closed between the junction with SR 410 to the north and the Mount Rainier National Park boundary (near Ohanapecosh Campground) to the south for the winter season.
- Distance: 0.4 miles
- Elevation gain: Less than 100 feet
- Wildflowers and wildlife: This hike has plenty of birds and squirrels. There is also a small meadow of wildflowers near the end of the trail, with many native plants and trees to explore.
If your kids want to get their wiggles out, this trail is perfect. At less than half a mile, the walk begins behind the Ohanapecosh Visitor Center and ends at Campground Loop B. Trek through the woods and discover native plants and trees. Read the information on the small placards indicating the names of the greenery. The cards also share some medicinal purposes of the flora. Count the rings of an old tree stump and learn about the historical events of the land. Follow your nose to what smells like rotten eggs, actually sulfur. Arrive at the hot springs area, where a resort once stood. Take the path to the open field where the hot spring runoff forms small puddles of warm water. Continue your hike to Silver Falls Trail or return to the bridge and peer over. Admire the emerald-green waters of the Ohanapecosh River.
Silver Falls Trail
- Distance: 2.7 miles
- Elevation gain: 300 feet
- Wildflowers and wildlife: You’ll see mushrooms and towering trees, but not many wildflowers. Listen for woodpeckers, other birds and be on the lookout for deer.
A fairly level and well-maintained trail, this hike starts at the Ohanapecosh campground and goes into an old-growth forest. Follow the trail, along the Ohanapecosh River about 1.5 miles to the falls. As you get closer to the falls, many smaller trails will lead to river overlooks. Rangers advise caution along these smaller trails and recommend staying on the main path. The rocks near the river and falls are covered in moss and may be wet and slippery. The path will give you beautiful vantage points of Silver Falls. Along the way, admire the tall trees and enormous boulders hedging the path. Take in the views of the falls, cross the bridge, and head back to the campground.
Longmire and Cougar Rock Area Trails
Trail of the Shadows (Easy, 0.7 miles)
- Distance: 0.7 miles
- Elevation gain: 39 feet
- Wildflower and wildlife: The trail takes you through an old-growth forest. Look out for salamanders and frogs on the ground.
Another great hike to stretch your legs or add to a series of hikes at Mt. Rainier National Park is the Trail of Shadows. This trail is a historical loop around Longmire Meadow. Beginning across the main road from the Longmire Museum, the path is an interpretive self-guided trail. Be sure to stay on the trail that leads you along the Trail of Shadows loop. A connecting trail, the Rampart Ridge Loop is considered moderate-to-challenging and a longer hike, so watch for signage and interconnecting trails. On the Shadows hike you’ll come across a hot springs ring from the old Longmire Medical Springs Resort (est.1890), then a log cabin made for employees of the resort, and finally a second spring called “Iron Mike.” Don’t miss the meadow overlook too. Circle your way back to the head of the trail to finish.
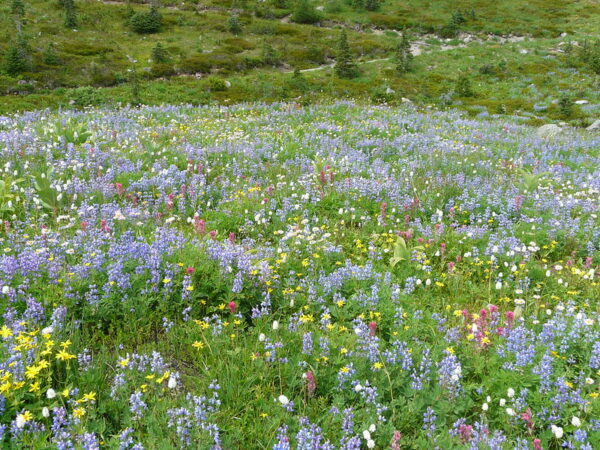
Wildflowers along the Alta Vista Trail. (Image: jb10okie/Flickr CC)
Nisqually/Paradise Area Trails
Take a walk into the Paradise Visitor’s Center and pick up a map inside or at the kiosk to help orient you while on the trails. Join a guided walk and purchase food or a souvenir as well.
Nisqually Vista Trails (Easy, 1.2 miles)
- Distance: 1.2 miles
- Elevation gain: 200 feet
- Wildflowers and wildlife: This is a prime spot for visitors to enjoy the wildflowers. Look out for marmots, piku, white-tailed deer and birds.
A popular loop near Paradise Inn, the hike is great for walking in the summer and snowshoeing in the winter. The trail is completely paved and stroller-friendly. Start your hike at the northwest end of the parking lot and climb the stone stairs to the trail junction. Follow the signs around the loop (counterclockwise, recommended). Take a moment to view the Nisqually Glacier and the Nisqually River Valley. If you have a stroller, start from the upper parking lot and use the ramps to join the trail.
Skyline Trail to Myrtle Falls (Easy, 1 mile)
Note: Stevens Canyon Road is closed in winter.
- Distance: 1 mile
- Elevation gain: 100 feet
- Wildflowers and wildlife: Spy a marmot or a squirrel in the meadow. You’re in for a treat because the hills are alive with plenty of flowers in August.
The Skyline trailhead is located on the north side of the upper parking lot and next to the visitor’s center. Walk about a half-mile on the paved trail and it will lead you to a 72-foot-high waterfall called Myrtle Falls. Known as one of the most photographed places on Mt. Rainier, you’ll catch this beautiful waterfall flowing against the majestic Rainier backdrop, dropping down into Edith Creek and flowing into Paradise Valley. Kids will love walking across the bridge high above the falls. Turn back to complete the 1-mile hike. If you continue on past the falls, the trail is longer and a little more challenging.
Hikers report that this trail gets very crowded. Get to the park earlier in the day or hike later in the evening. The entire Skyline Trail Loop is considered moderate to difficult, so if you decide to continue on, be aware that it will pose some challenges for young children.
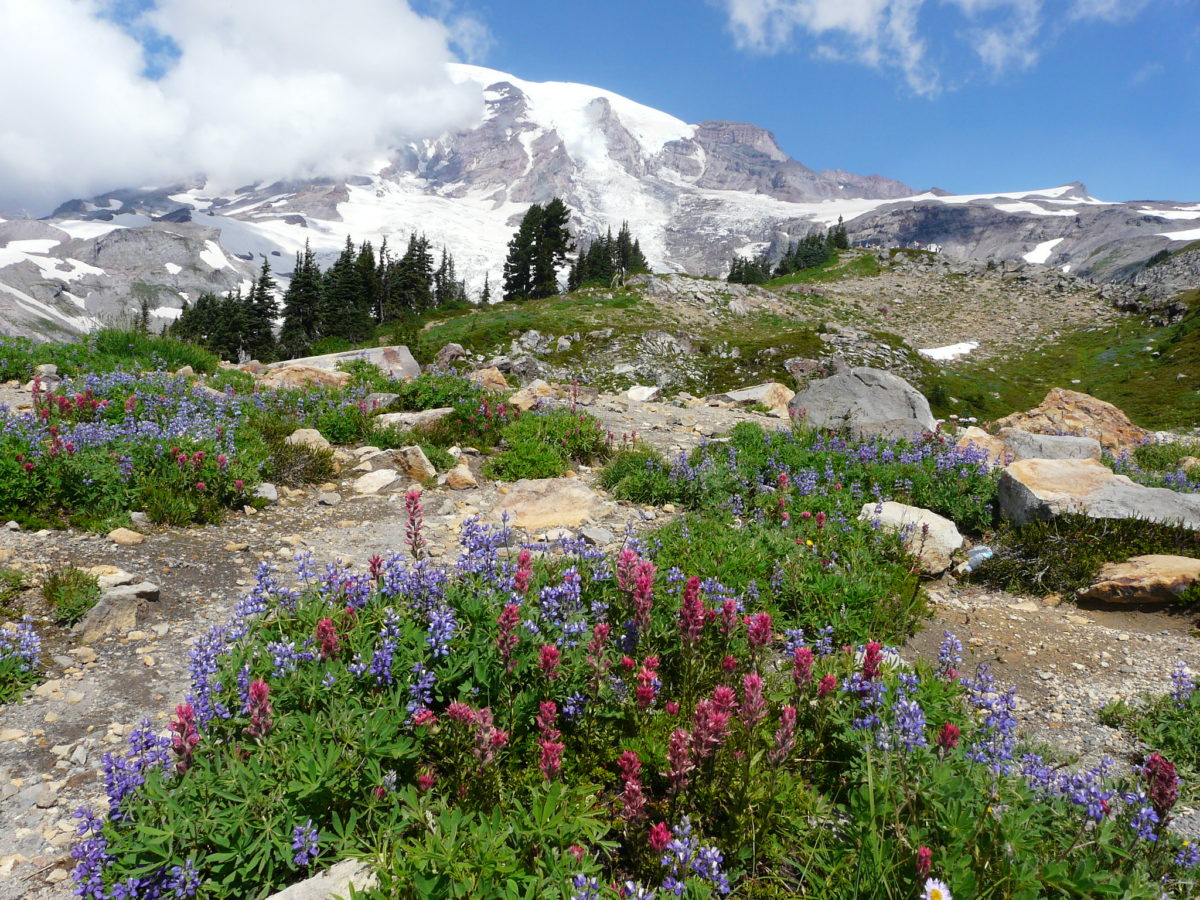
Alta Vista (Moderate, 1.5 miles)
- Distance: 1.5 miles
- Elevation gain: 560 feet
- Wildflowers and wildlife: There are many wildflowers to see here, peaking at the end of August. Look out for marmots, squirrels, deer, and birds.
The Washington Trails Association classifies this hike as moderate, making it great for hearty hiker families. Climb the steep gravel hill at the start of the trail and head to the top, where the path is paved and easy to navigate. Walk past fields and fields of wildflowers and beautiful views of the mountain. Another popular trail, this is best done in the early mornings or evenings. Watch your kids on these narrow paths and shallow steps. Stay off of the wildflowers and on the paved path.
Naches Loop Trail Photo: Michael Herbert
Other Popular Hikes at Mt. Rainier National Park
Tipsoo Lake to Naches Peak: Access through Chinook Pass area
- Distance: 3.5 miles
- Elevation gain: 500 feet
- Wildflowers and wildlife: Venture out to see a rainbow of blooms throughout the months of July and August. Spy butterflies, bees and bugs in the meadows while there are trout swimming in the lakes and tadpoles metamorphosing into frogs.
Get excited for lots of wildflowers in the summer, alpine lakes, and beautiful views of the mountain on this kid-friendly hike at Mt. Rainier National Park. There are four places that this hike can start from, but the easiest route is from the Tipsoo Lake picnic area near Chinook Pass. Be sure to get your Northwest Forest Pass before heading to the parking lot.
Follow the signs to take the trail, clockwise, for the best views of Mt. Rainier. Take the dirt path past the lake and through the meadows to admire the flowers. Stop at one of the many small lakes to find tadpoles, frogs, and even trout. Hikers recommend taking it easy on the very steep portion right out of the lake area to the overpass above Highway 410.
From there, the trail meanders up and down to a small lake and then gets a little steeper. The steeper portions are manageable with some careful footing. At the top of the ridge, things level out as you approach a junction with one trail leading to Dewey Lakes and another continuing west on the Naches Loop trail. As you go in and out of this trail, watch for roots on the ground.
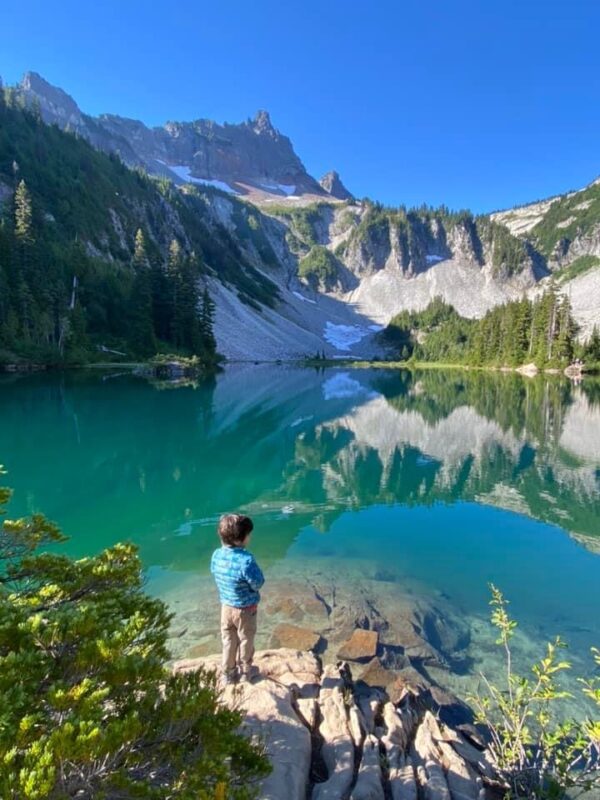
Snow Lake (Image: Nadxelle Velasco Gutierrez)
Bench and Snow Lakes Trails: Access along Stevens Canyon Road/Paradise area
- Distance: 2.5 miles
- Elevation: 700 feet
- Wildflowers and wildlife: There are plenty of summer flowers along the trails. Be sure to keep an eye out for blueberry bushes to pick a little treat along the way. Spy some fish in the lake too!
The trails ascend to two mountain lakes fed by the snowfields of Unicorn Peak. After traversing a series of low ridges, you’ll reach Bench Lake, then Snow Lake. Find wildflowers, lakes and beautiful views all along this moderate hike. Best for older kids, if you take your toddlers they’ll need help climbing numerous shallow stairs, up and down until you reach Bench Lake. Stay a while at Bench Lake for lunch or a snack, then meander over to the shore to dip little toes into the cool lake. If you look closely you may see fish jumping up to catch bugs.
Make way on the trail to reach Snow Lake. There’s no shore to play, but you’ll still have fun looking at the views and peering into the emerald-green waters. To reach the campsite, cross a log bridge with no rails. If you’re not staying to camp, turn around and follow the path out.
Look low to the ground for blueberry bushes. One hiker recommends picking this sweet treat at the end of summer. Pluck a handful to take home or eat as a snack. Park rangers informed me that visitors can scavenge for one gallon of berries or mushrooms per person, each day. So there’s plenty to save for a berry pie the next day! If you choose to camp at this spot, proper permits must be purchased ahead of time.
NOTE: Many hikers have reported that this trail is infested with bugs, flies, and mosquitoes, making the hiking experience less than ideal. Bring your bug spray, cover yourself up, and wear layers. One hiker commented that wearing a mosquito net helped tremendously. Also note that the Rangers have said hikers must hop over one rock across a creek along the trail.
What to bring and some reminders:
- Dress for the weather and in layers. Hiking boots are recommended for climbing over rocks, gravel and dusty paths.
- Wear your sunscreen, hat, and sunglasses on hot summer days.
- Bring plenty of water and snacks to sustain a day trip to the park.
- Mosquitos and bugs: It’s a fact of life that there are bugs and mosquitoes out on the trails, especially in the summer. Choose your best bug deterrent, wear layers of clothes, and don’t linger for very long. Hikers have gone home with many itchy bites all over their face and body.
- Flowers, plants, and other natural items should not be picked up or taken home. Pack out all your trash and belongings.
- Pre-arrange a meeting place in case you get lost on your hike.
- Do not feed or approach wildlife, including squirrels.
- No pets are allowed at the park.
- Avoid long wait times at the entrance and purchase your passes ahead of time.
- 2026 Fee-free days are February 16, May 25, June 14, July 3-5, August 25, September 17, October 27, and November 11. Starting in 2026, fee-free days apply to U.S. Citizens only.
- Summer weekends bring many visitors to the park; try to plan your trip for a weekday.
- Visit All Trails and the Washington Trails Association for the most up-to-date reviews of these kid-friendly hikes at Mt. Rainier National Park.
More Kid-friendly Hikes to Explore
Not every adventure has to be a full day trip. These guides highlight easy, family-friendly hikes closer to Seattle:
- Easy hikes near Seattle for kids | Short, accessible trails perfect for everyday outings with little ones.
- Easy waterfall hikes near Seattle | Chase waterfalls on these quick, kid-friendly hikes with big scenic rewards.